Understanding Airtight Membranes
Over the past few years airtightness has become a big deal in construction and it’s important to understand the materials and products involved whether you’re an architect, a contractor or a home owner.
There are a lot of products out there and it’s critical to choose the right one at the right price, especially now that material costs have ballooned.Let’s quickly go over some of the foundational aspects of airtightness and what materials are used in airtight residential builds. Airtightness involves creating an airtight barrier around the house to prevent cold air from entering and warm air from leaving.
A well-ventilated and airtight home is required to reach energy consumption targets in any new build or retrofit, otherwise all the warm air will just leave and the temperature difference will lead to moisture and condensation issues.
To make a build airtight you need to create an airtight envelope, so that you have a continuous layer on the internal side of the building that prevents unwanted air leakage. This requires selecting the correct materials for the job, for which there are many types of membranes and tape that all have different use cases and aren’t always used right, so let’s go over them.
Airtight Membranes
There’s a few types of membranes and their use case depends on the build.
Airtight membranes are used internally in floors, walls and lofts to create an airtight envelope and they have two important functions. Firstly it’s used for airtightness and secondly its used for vapour control to protect the building from moisture and condensation.
An airtight membrane will be as the name implies – airtight, this doesn’t differentiate one product from another. What separates different products is how they deal with moisture, that is why the two most important aspects to an airtight membrane are:
1. The SD value
2. Whether the SD value is fixed or variable.
As a quick explainer, the SD value determines the vapour diffusion of the membrane and can be found on the datasheet. Whether it’s fixed or variable determines if the SD value changes based on the environment. This means variable membranes are more versatile (and far more expensive) than control membranes, but their use cases vary, you don’t always need a variable membrane.
What's the practical difference between control and variable membranes?
When working on a retrofit it’s nearly always recommended to use high performance variable membranes as they need to be able to deal with historic moisture in the building envelope.
These membranes are more expensive and can be used in nearly every use case where an airtight membrane is wanted or required, but they’re not always needed. For example, in the loft of a new build you don’t need a variable membrane, you can use a far more affordable fixed SD control membrane for the same effect.
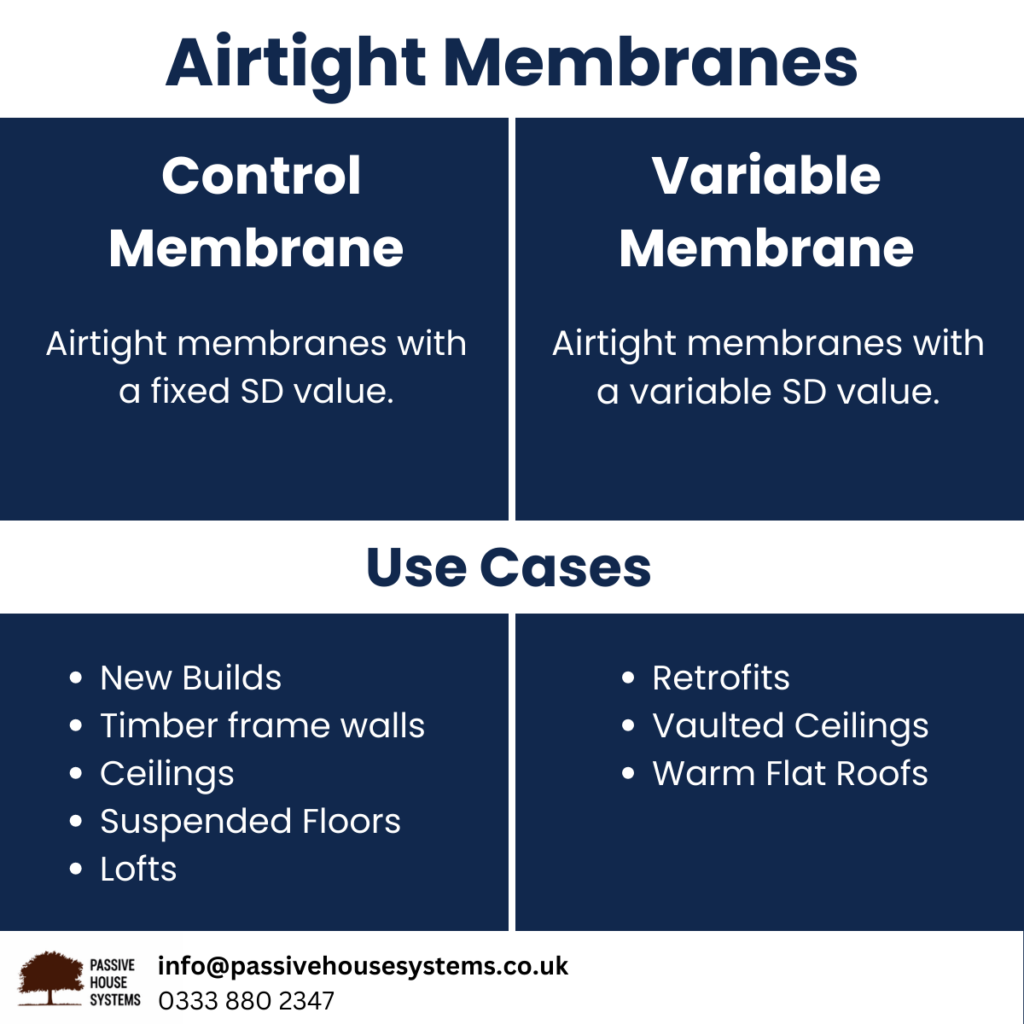
The versatility of a variable membrane is just not always needed. Having a good understanding of different membranes or contacting specialists can save a lot of time and money by using cost effective materials to get results. Below is an image showing use cases.
There are different considerations when it comes to apartments and commercial properties which are outside the scope of this post. This will be updated in the future with a link about apartments and commercial properties.
Price Difference Between Membranes Explained
Why are some membranes so much more expensive than others? There are membranes available for £1 per m2 and some on offer for £3 or £4 per m2. Why?
There are expensive variable membranes with a high SD variation and scrim reinforcement.
Those membranes are stronger, harder to tear and more versatile in their vapour control, but if it’s a new build loft it’s not always needed when affordable membranes like the Apollo 2 are less than £1 per m2 while providing the same benefits of being airtight and preventing moisture build up.
There are other options, which include control membranes that have a slightly variable SD value such as Gerband SD Control. These membranes are not technically fixed SD as their diffusion varies, but their range would not be as robust as that of a variable membrane. This gives even more choice for a cost-effective membrane when higher performance is wanted and a variable membrane isn’t needed.
Airtight Membranes in Timberframe & Block Construction
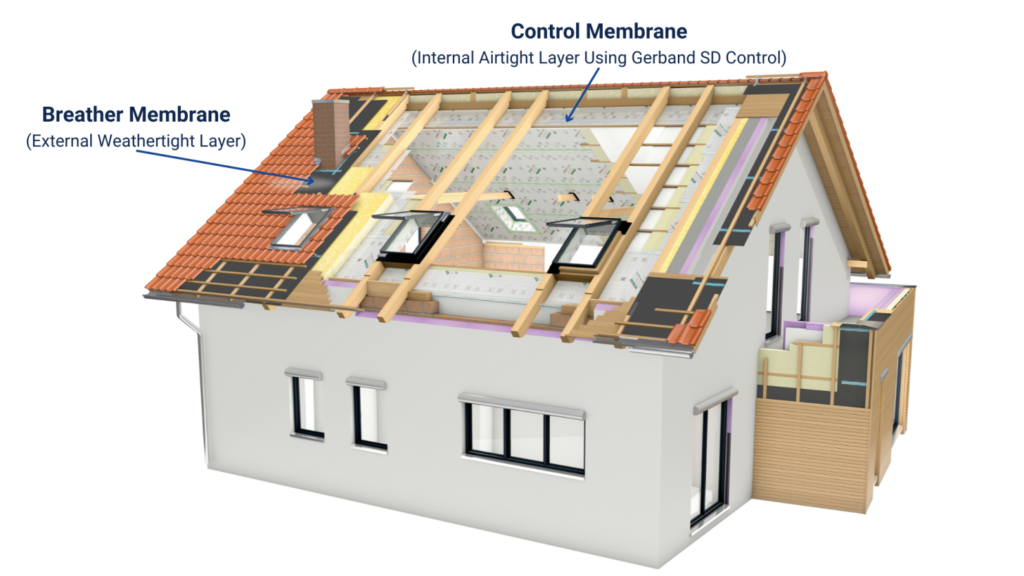
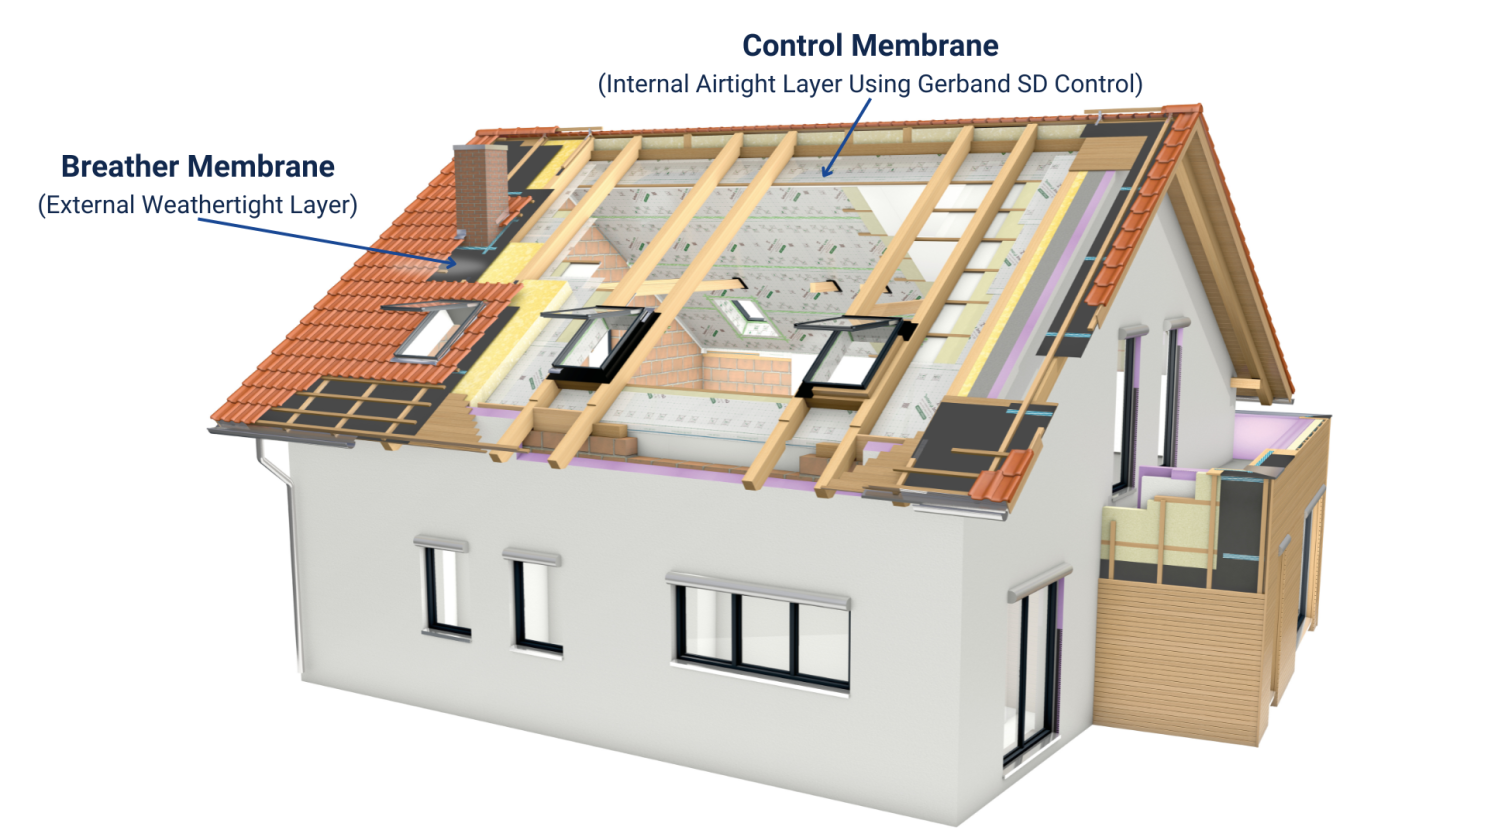
There are a few differences between timber frame and block construction when it comes to airtight membranes. In a timberframe you have an airtight layer on the internal side of the insulation and a weathertight layer on the outside. To make a timberframe airtight you will need to create an envelope with your membrane going from the floor, across the walls and all the way into the loft or top floor ceiling.
In a timberframe a control membrane is used for your airtight layer for the walls, junctions and ceiling/loft unless you have a flat warm roof in which case a variable membrane is required.
In a block construction, you do not need a membrane on the block walls at all. You will need to seal your windows, doors and place a membrane over the loft or ceiling. Whether your envelope includes the loft depends on if the loft is liveable or not, if it is you must extend your airtight layer into the loft.
Membranes For Passive Houses
If you want to achieve Passive House standards of airtightness and energy usage you might want to use a reflective control membrane. A reflective membrane has a metallic surface which reflects heat back into the house, increasing the efficiency of your insulation.
In a Passive House timberframe construction you would use a reflective membrane for your airtightness layer and tape up the seams with reflective tape, this will result in an airtight envelope which provides moisture control, airtightness and reflects heat back into the dwelling.
A reflective membrane isn’t required for a passive house, but it makes reaching your goal of energy usage per m2 that much easier.
Fixing & Sealing Airtight Membranes
The correct installation of airtight products is equally as important as picking the right ones. Membranes are installed either with staples, sealant or heavy-duty double-sided tape.
It’s important to consider that the fixing of the airtight layer must last at least as long as the materials themselves, which is 50 years.
You can use staples to fix the membrane to the rafters. When fixing to block then sealant or window tape is used. Double sided tape can be used for fixing to rafters, insulation panels and osb boards.
Keep in mind which substrates you’re using double sided tape on and follow manufacturer’s instructions, some substrates might require cleaning or priming to ensure a long-lasting seal.
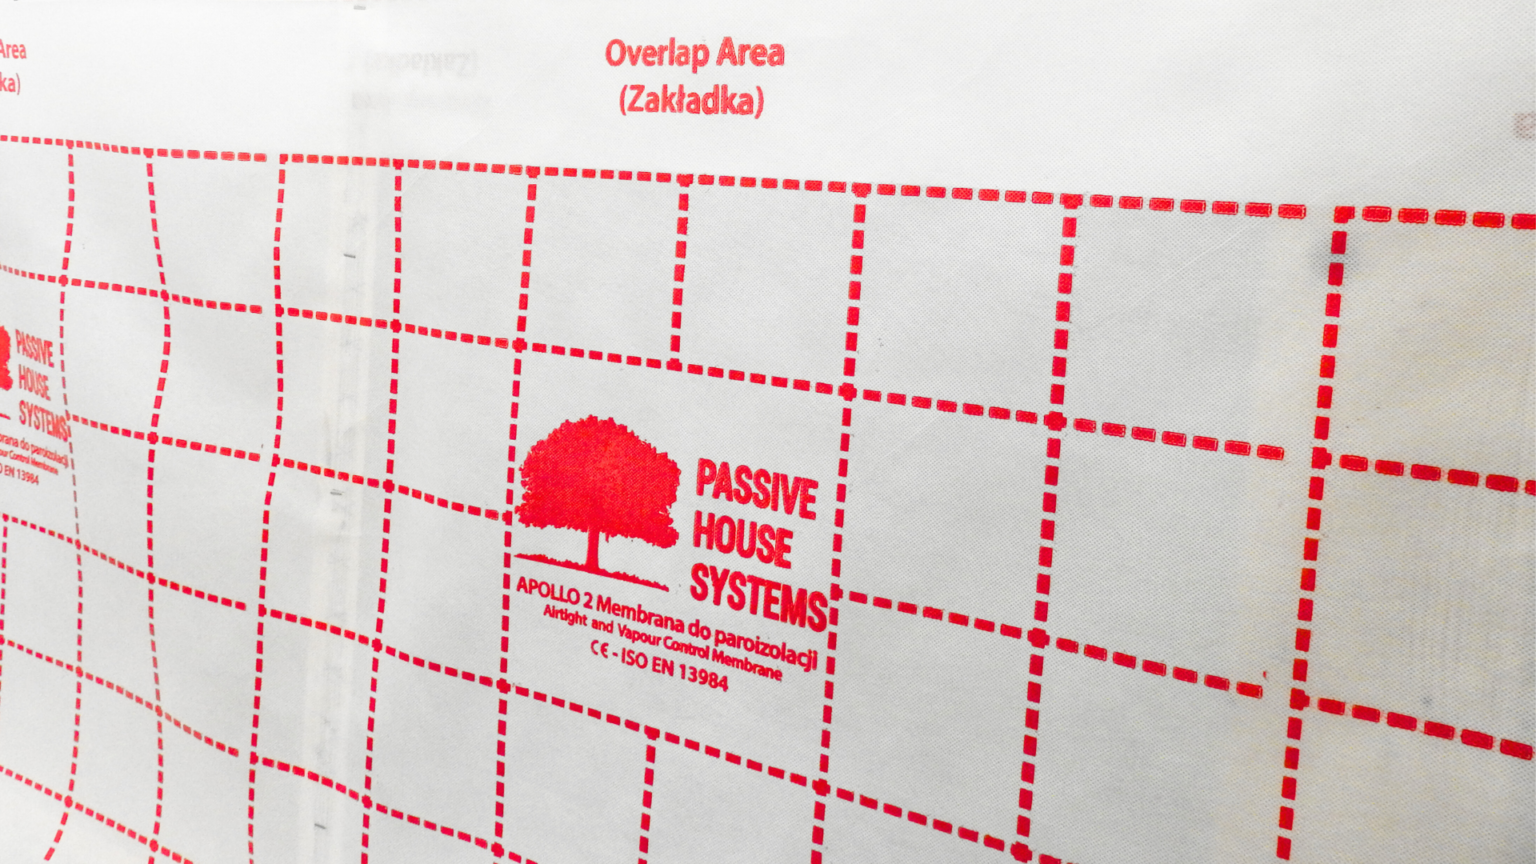
Airtight membranes come with clearly printed overlap guides, you fix your membranes, overlap them as indicated by the guides and then tape the seams using airtight tape.
When sealing membranes it’s recommended to use universal airtight tapes such as Gerband 586. It seals the membrane overlaps and creates an airtight envelope.
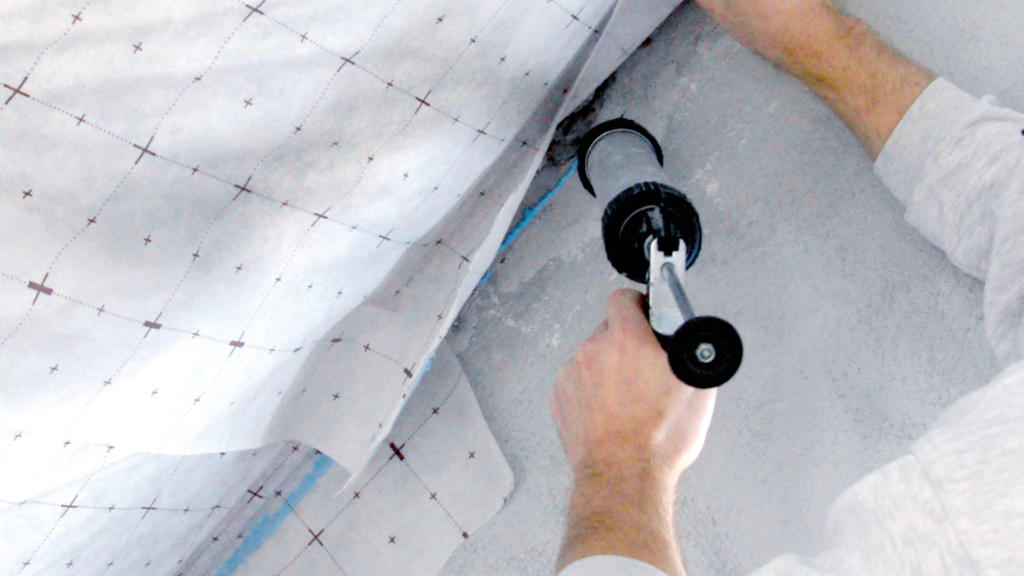
When there’s a junction between a membrane and a block wall it’s recommended to use a different material that bonds to block like an airtight sealant. You prime the substrate and place sealant going under the edge of the membrane and then place the membrane on top.
Have a look for installation instructions in application guides or datasheets for the product, these are also commonly inserted into membrane packaging.
We’ve covered the most important details of airtight membranes from use case to installation and hopefully this guide will make decisions easier in the future. There are many more critical aspects to airtightness, like the sealing of windows and doors, sealing of penetrations and airtightness in apartments and commercial properties which were touched on but not covered here.
If you’re working on an airtight project and want more details, you can contact Passive House Systems, message us on LinkedIn or even easier, comment your questions on this post! We’ll be sure to get back to you.
